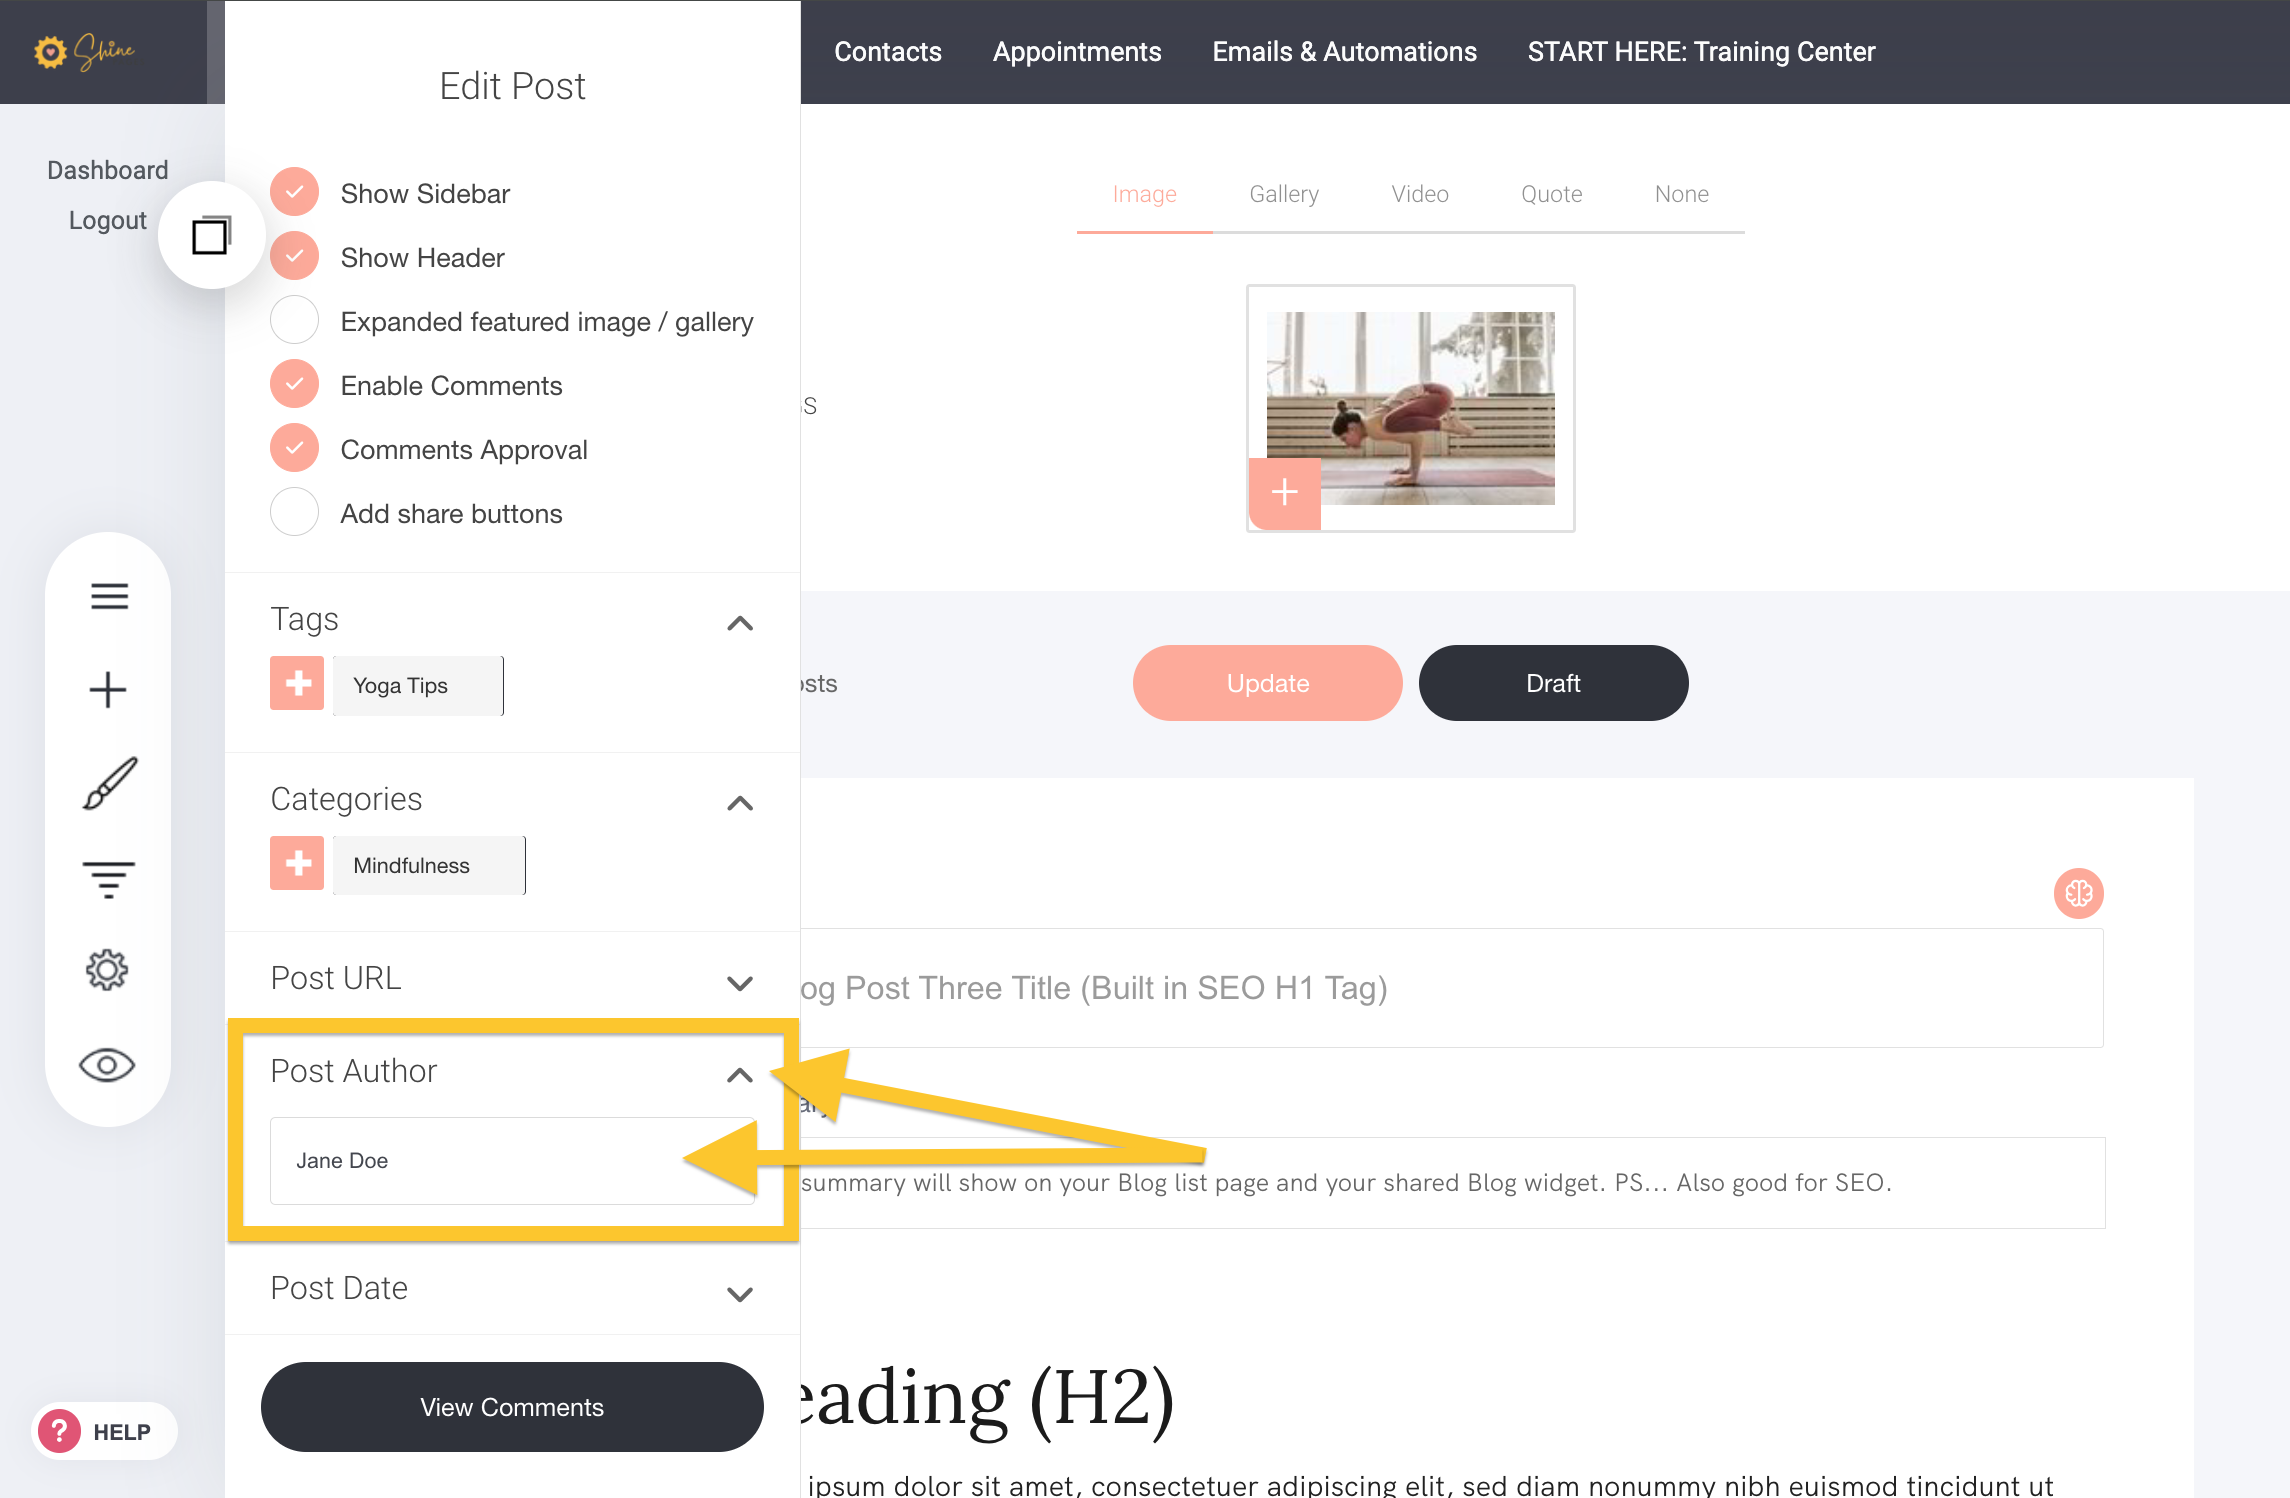
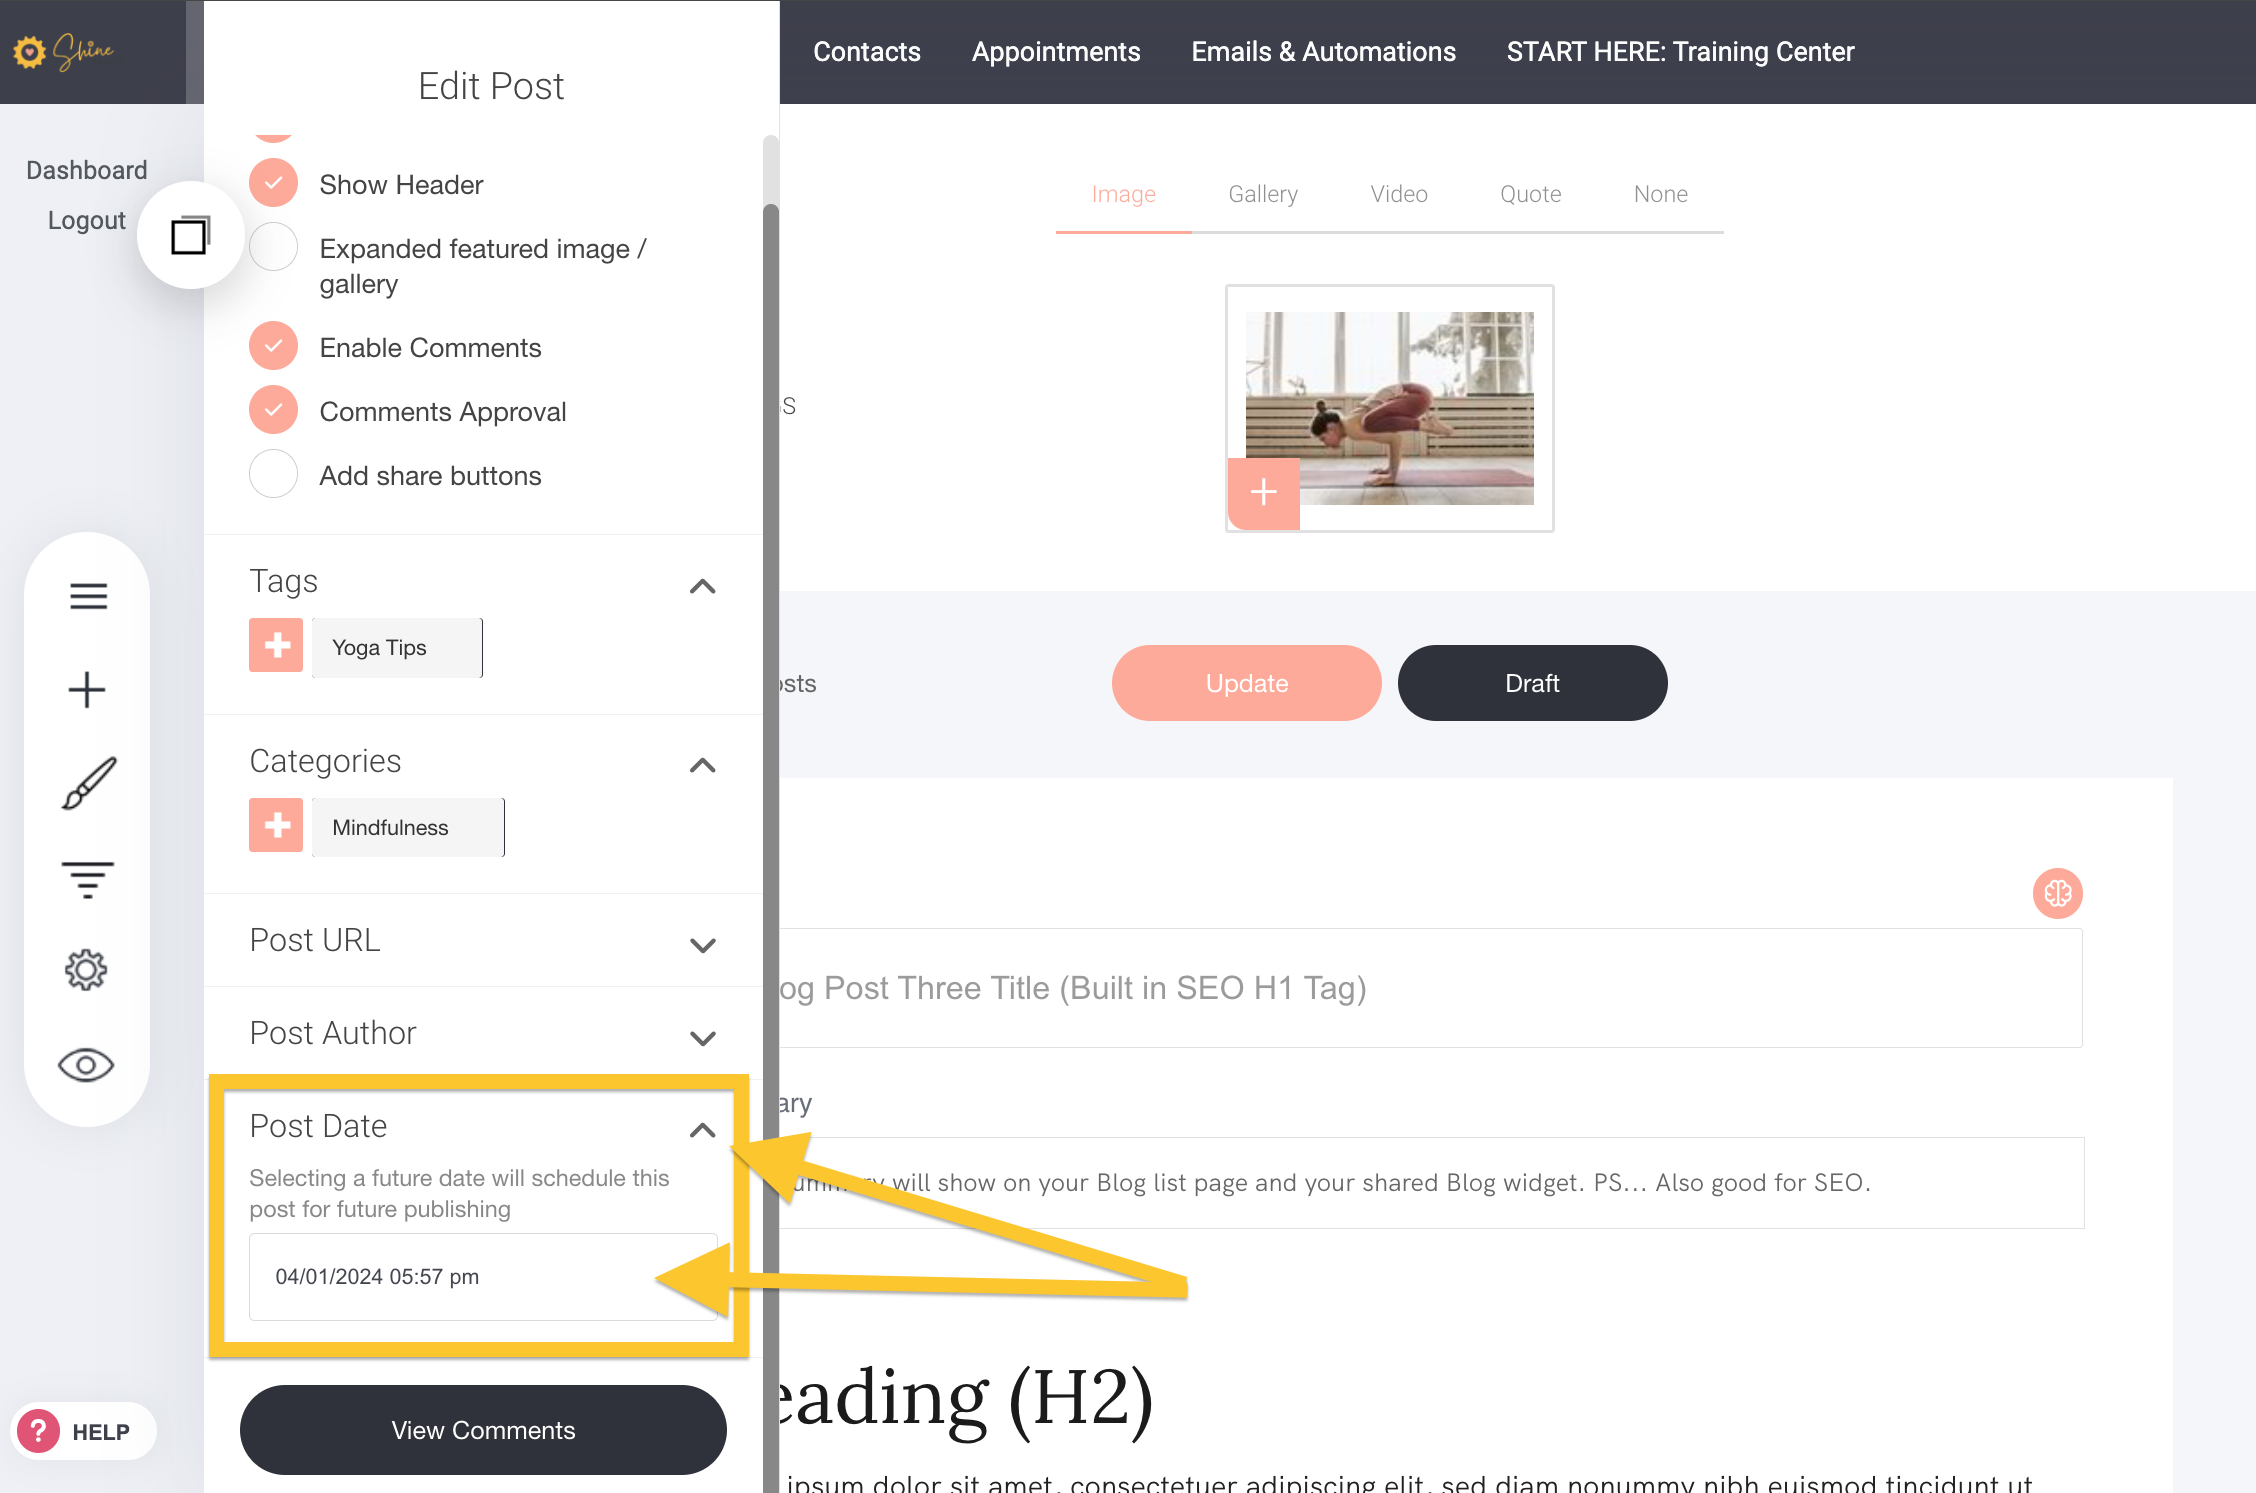
Blog Post Settings STEP 2.2
Set the post URL, set the category, tags, post author and post-date etc.

ShinePages Support
Last Update 2 éve
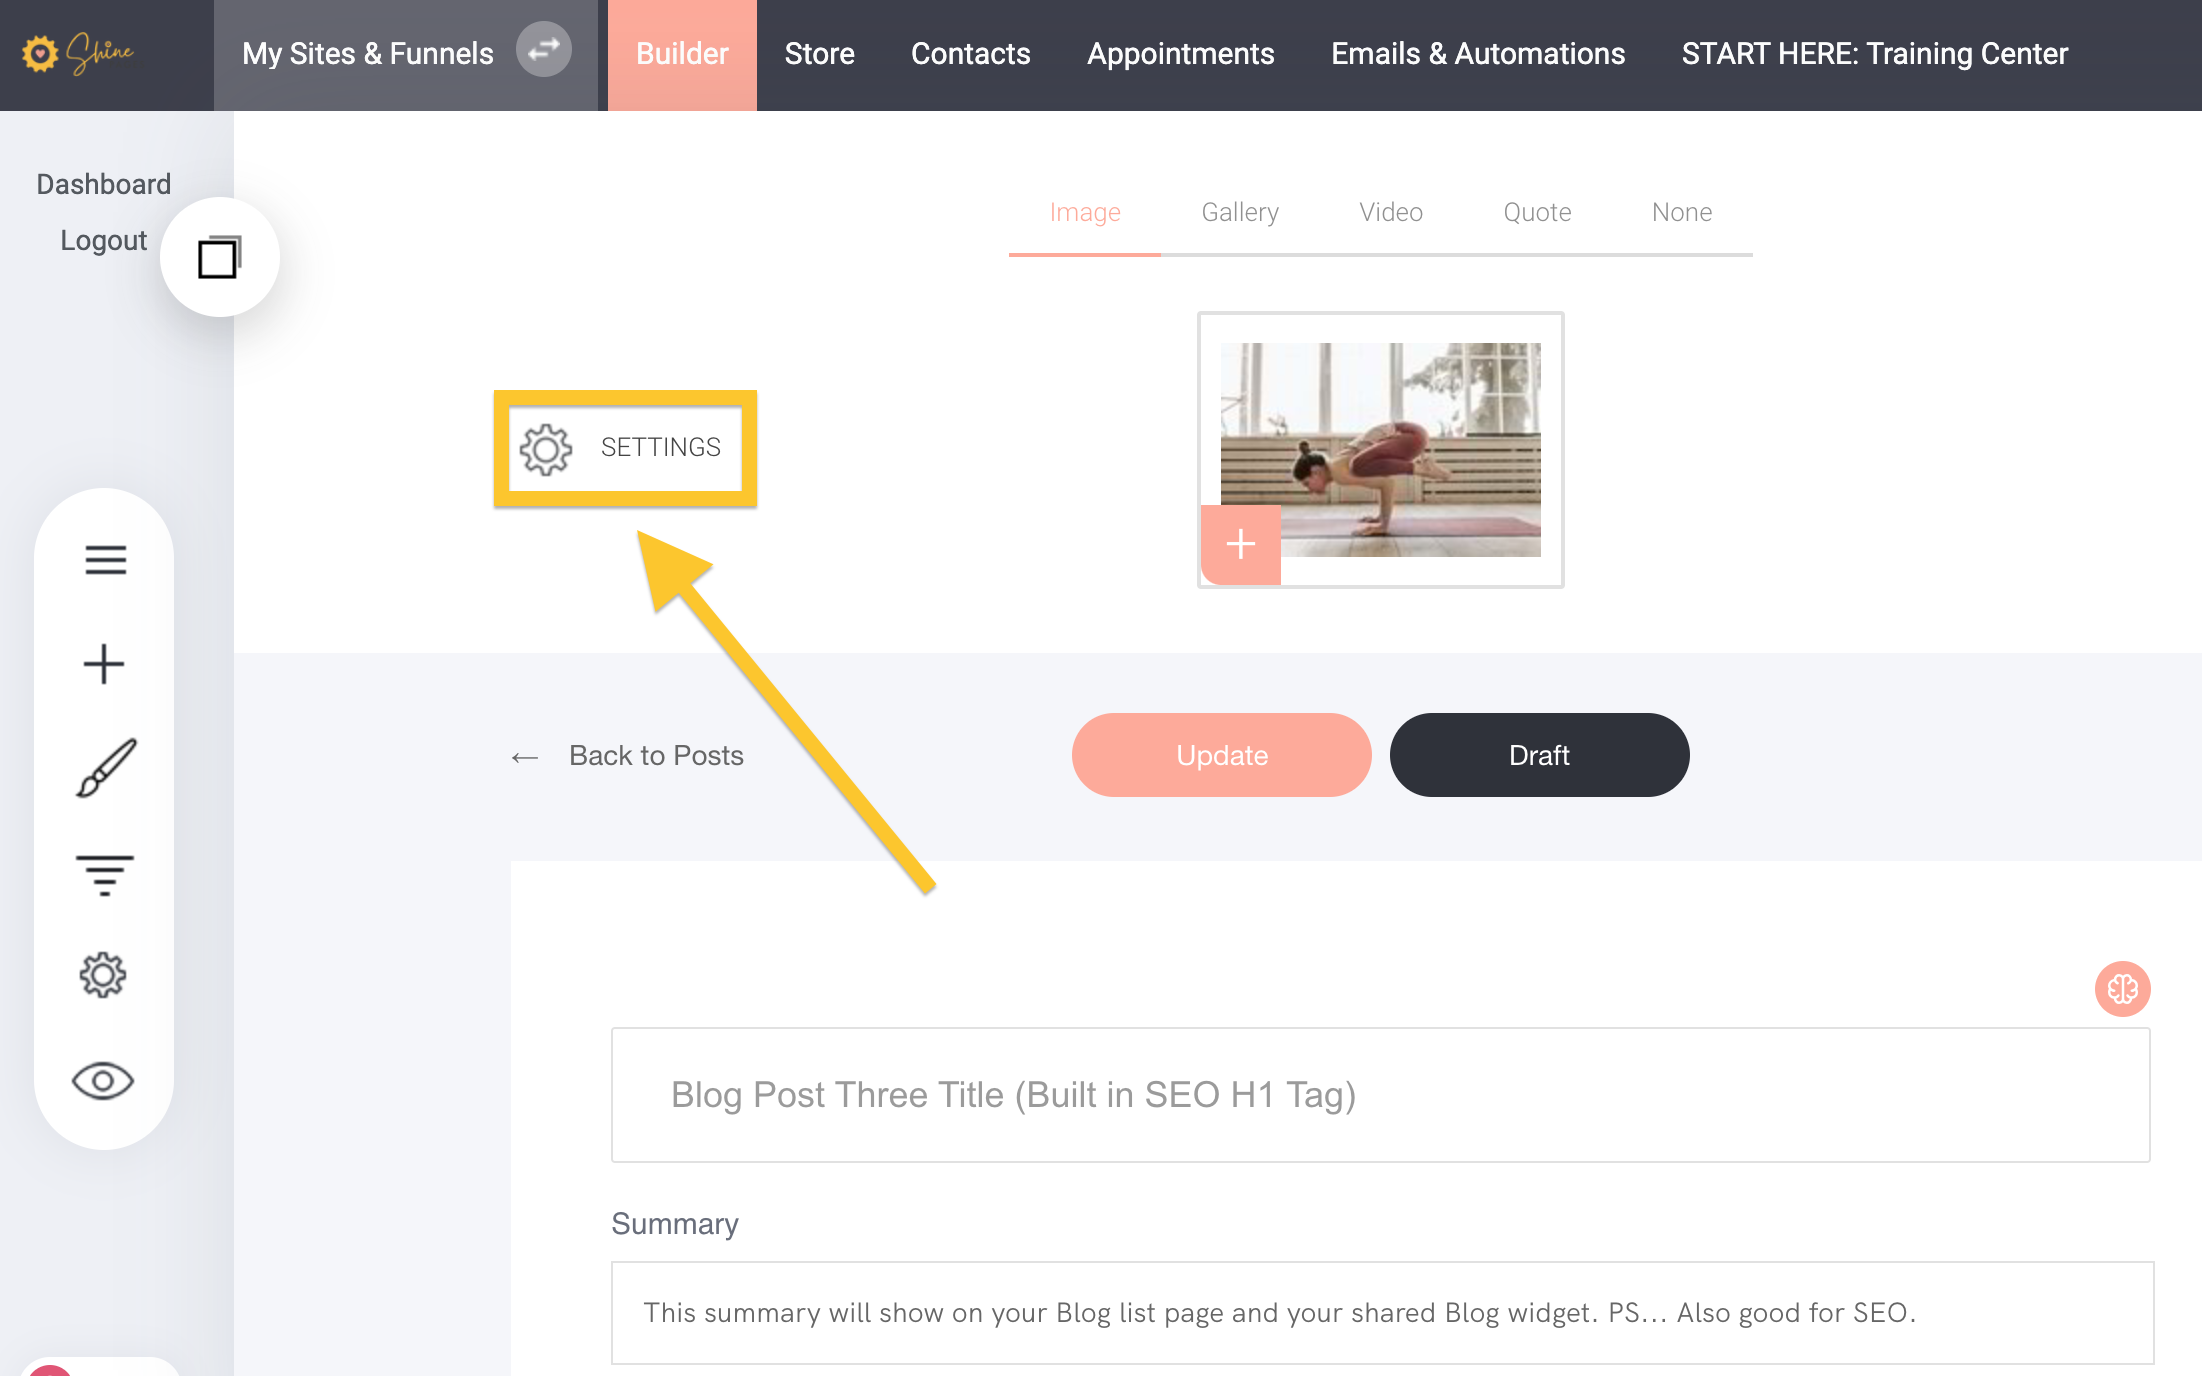
After designing the style and look of blog pages you will edit the settings for each page ie. set the post URL, set the category, tags, post author and post-date.
These will be visible live - either under your Blog List Title or in the Blog Side Bar etc. To edit these:
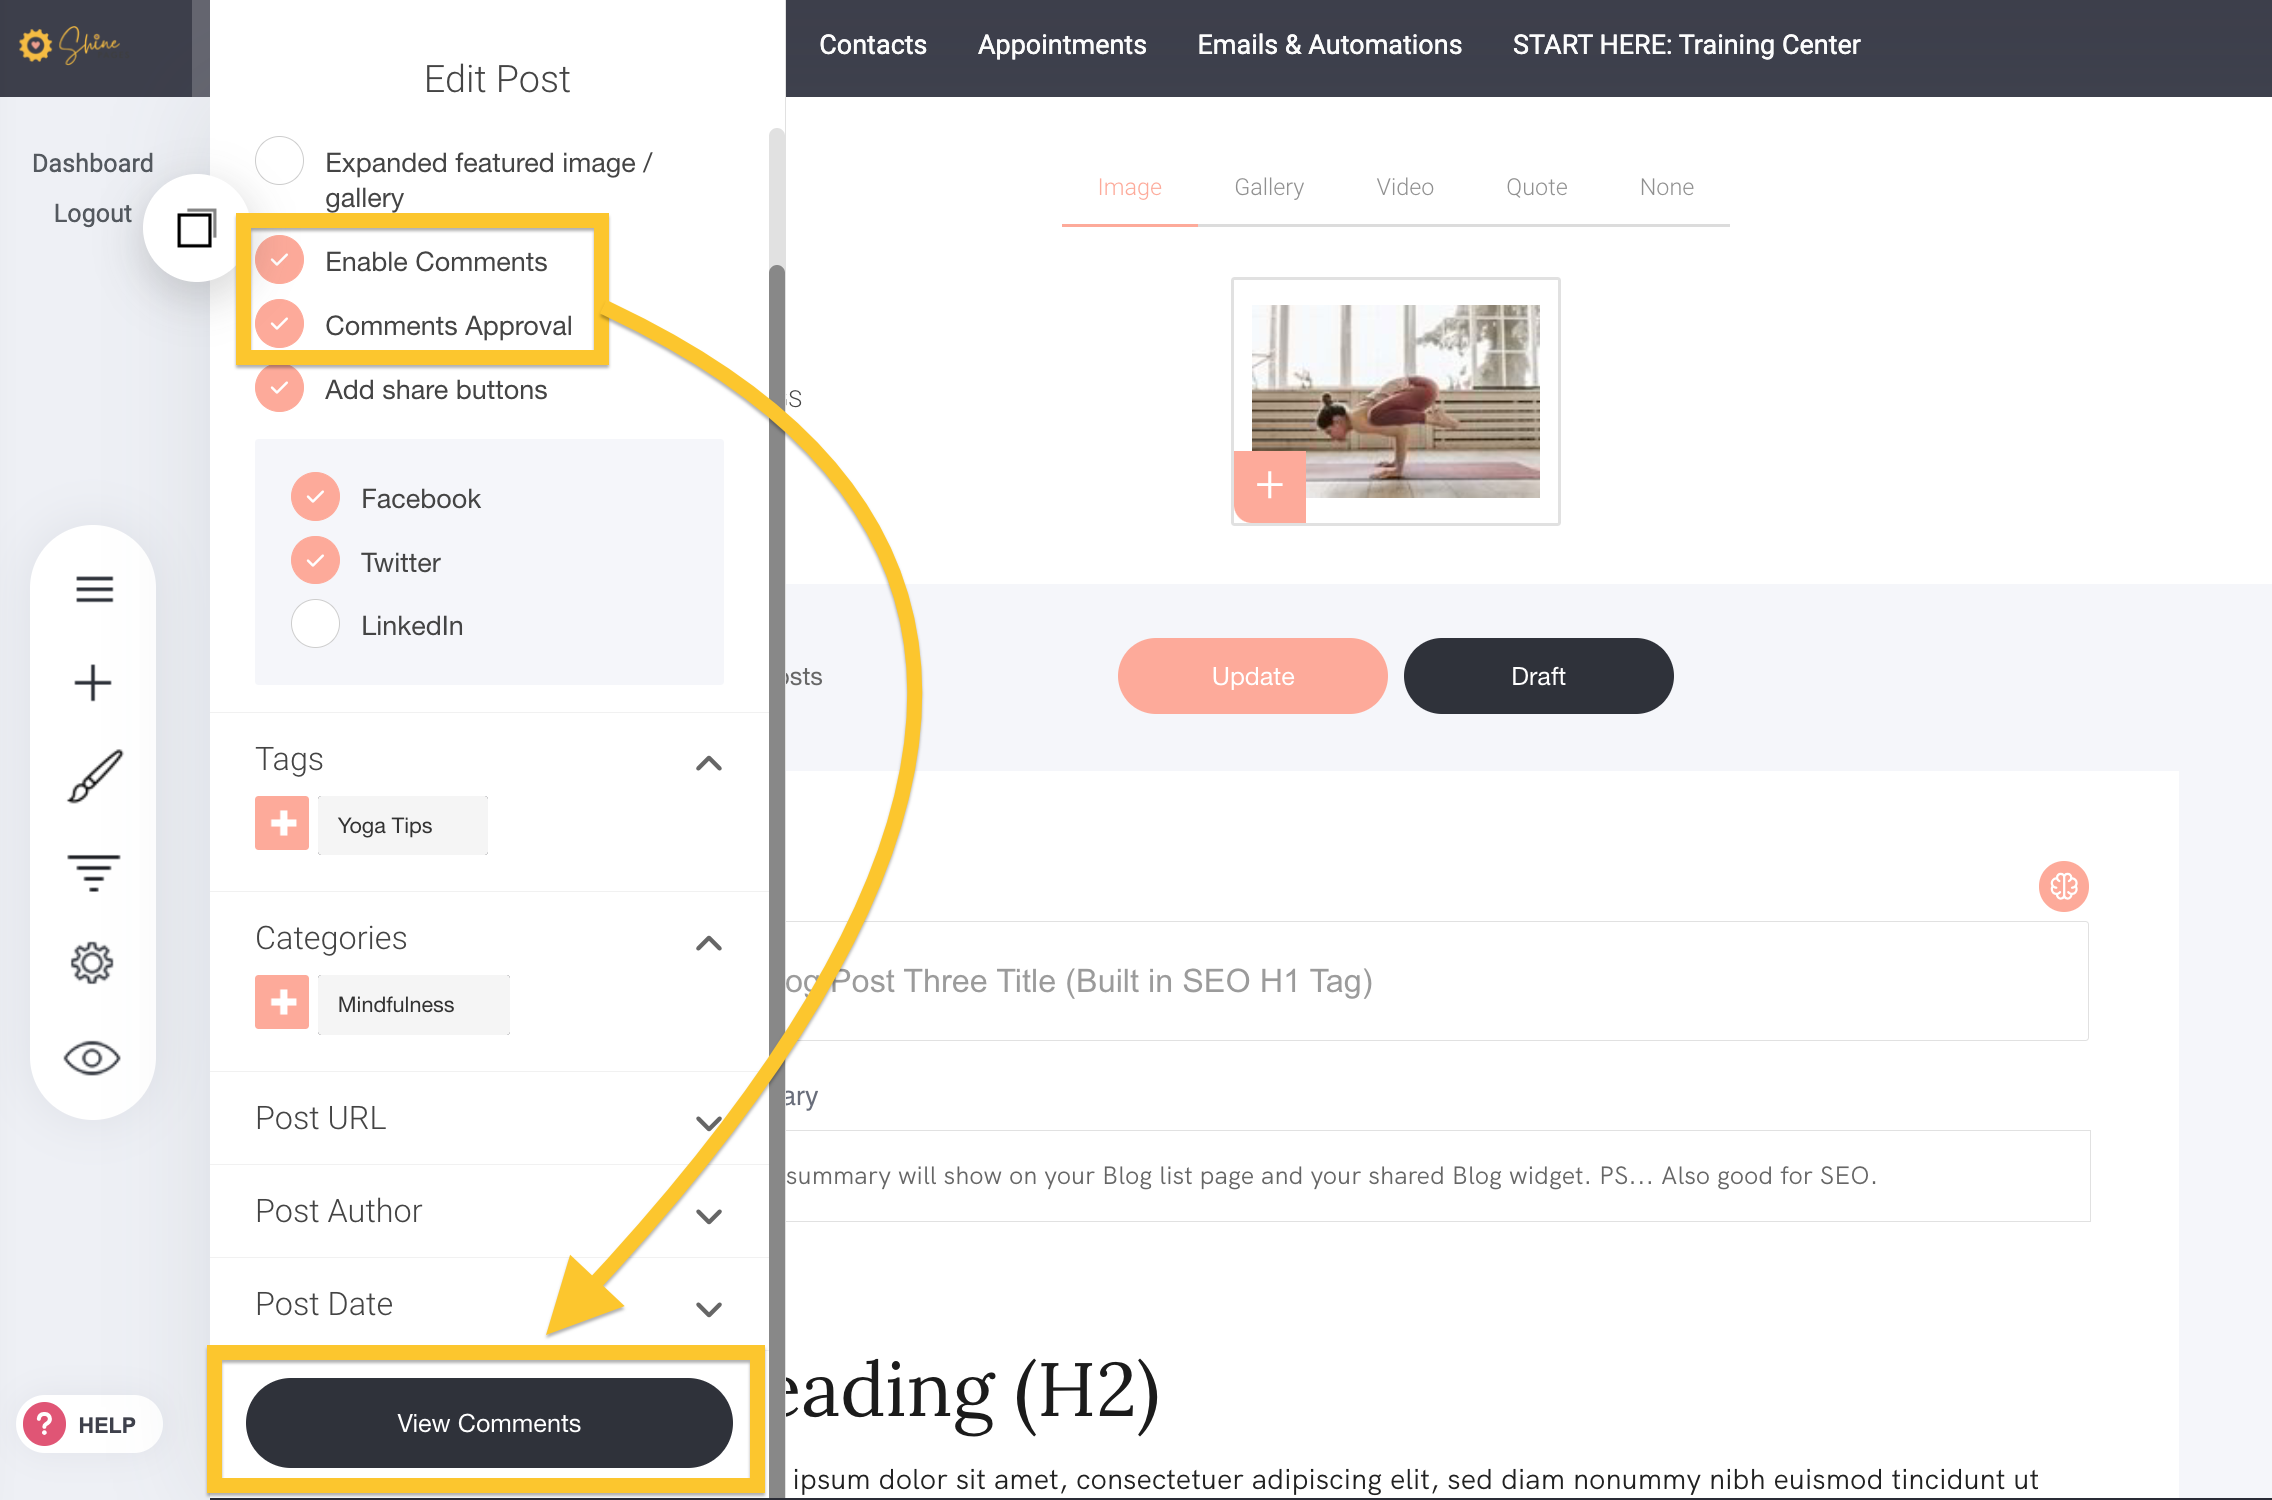
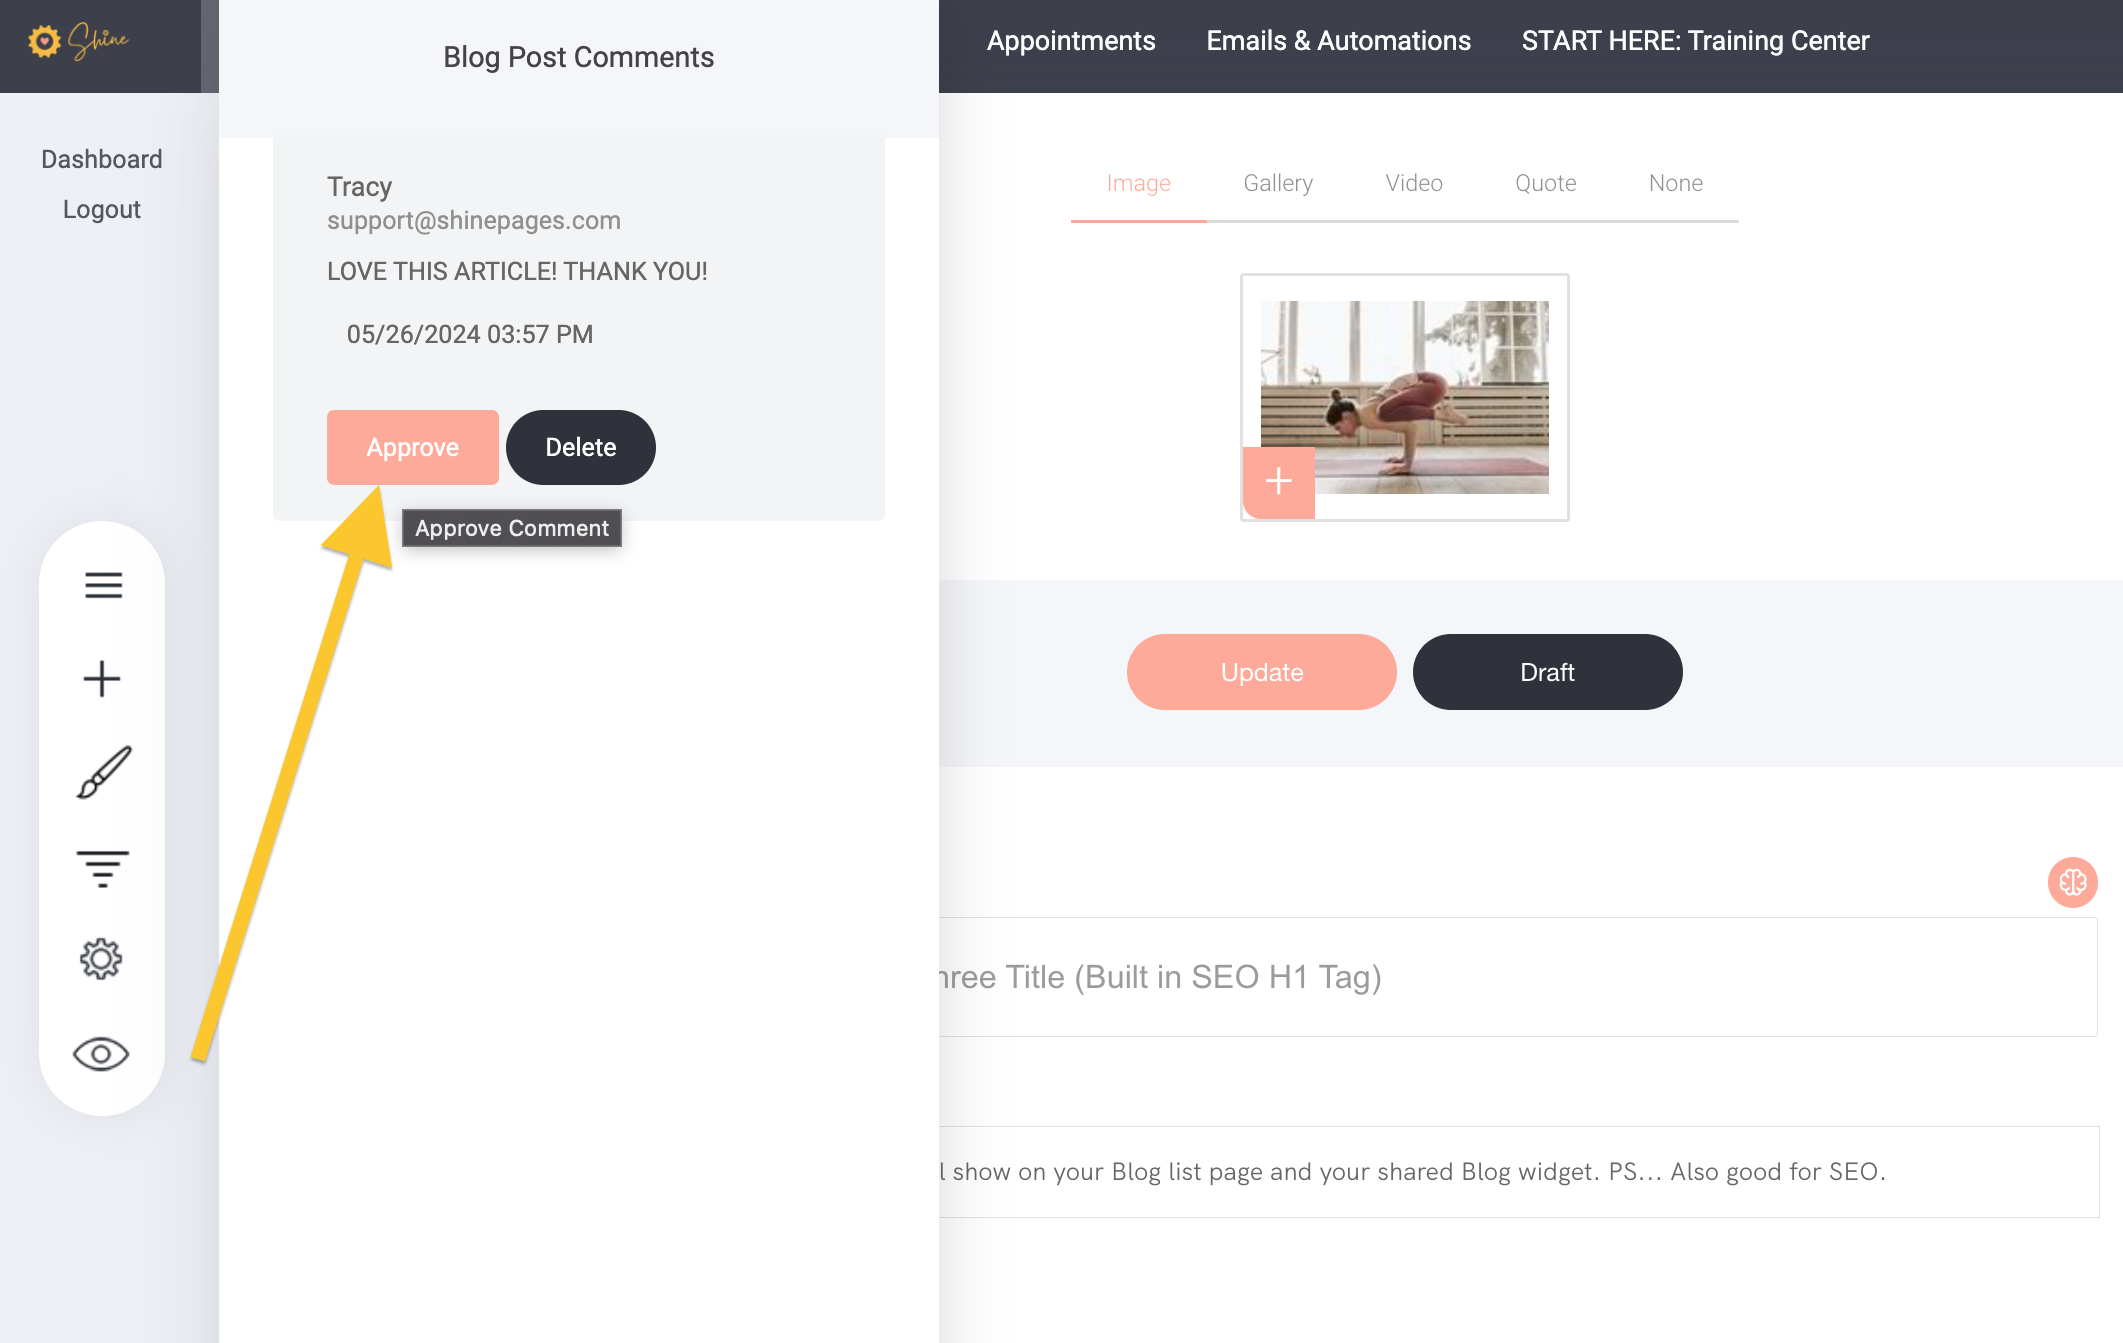
- If you selected “Comments Approval” - you will receive an automated email of this (please see Blog Homepage Settings to enable notifications with email address). To access your comments - click on the “View Comments” button as above and click on “Approve” or Delete”.
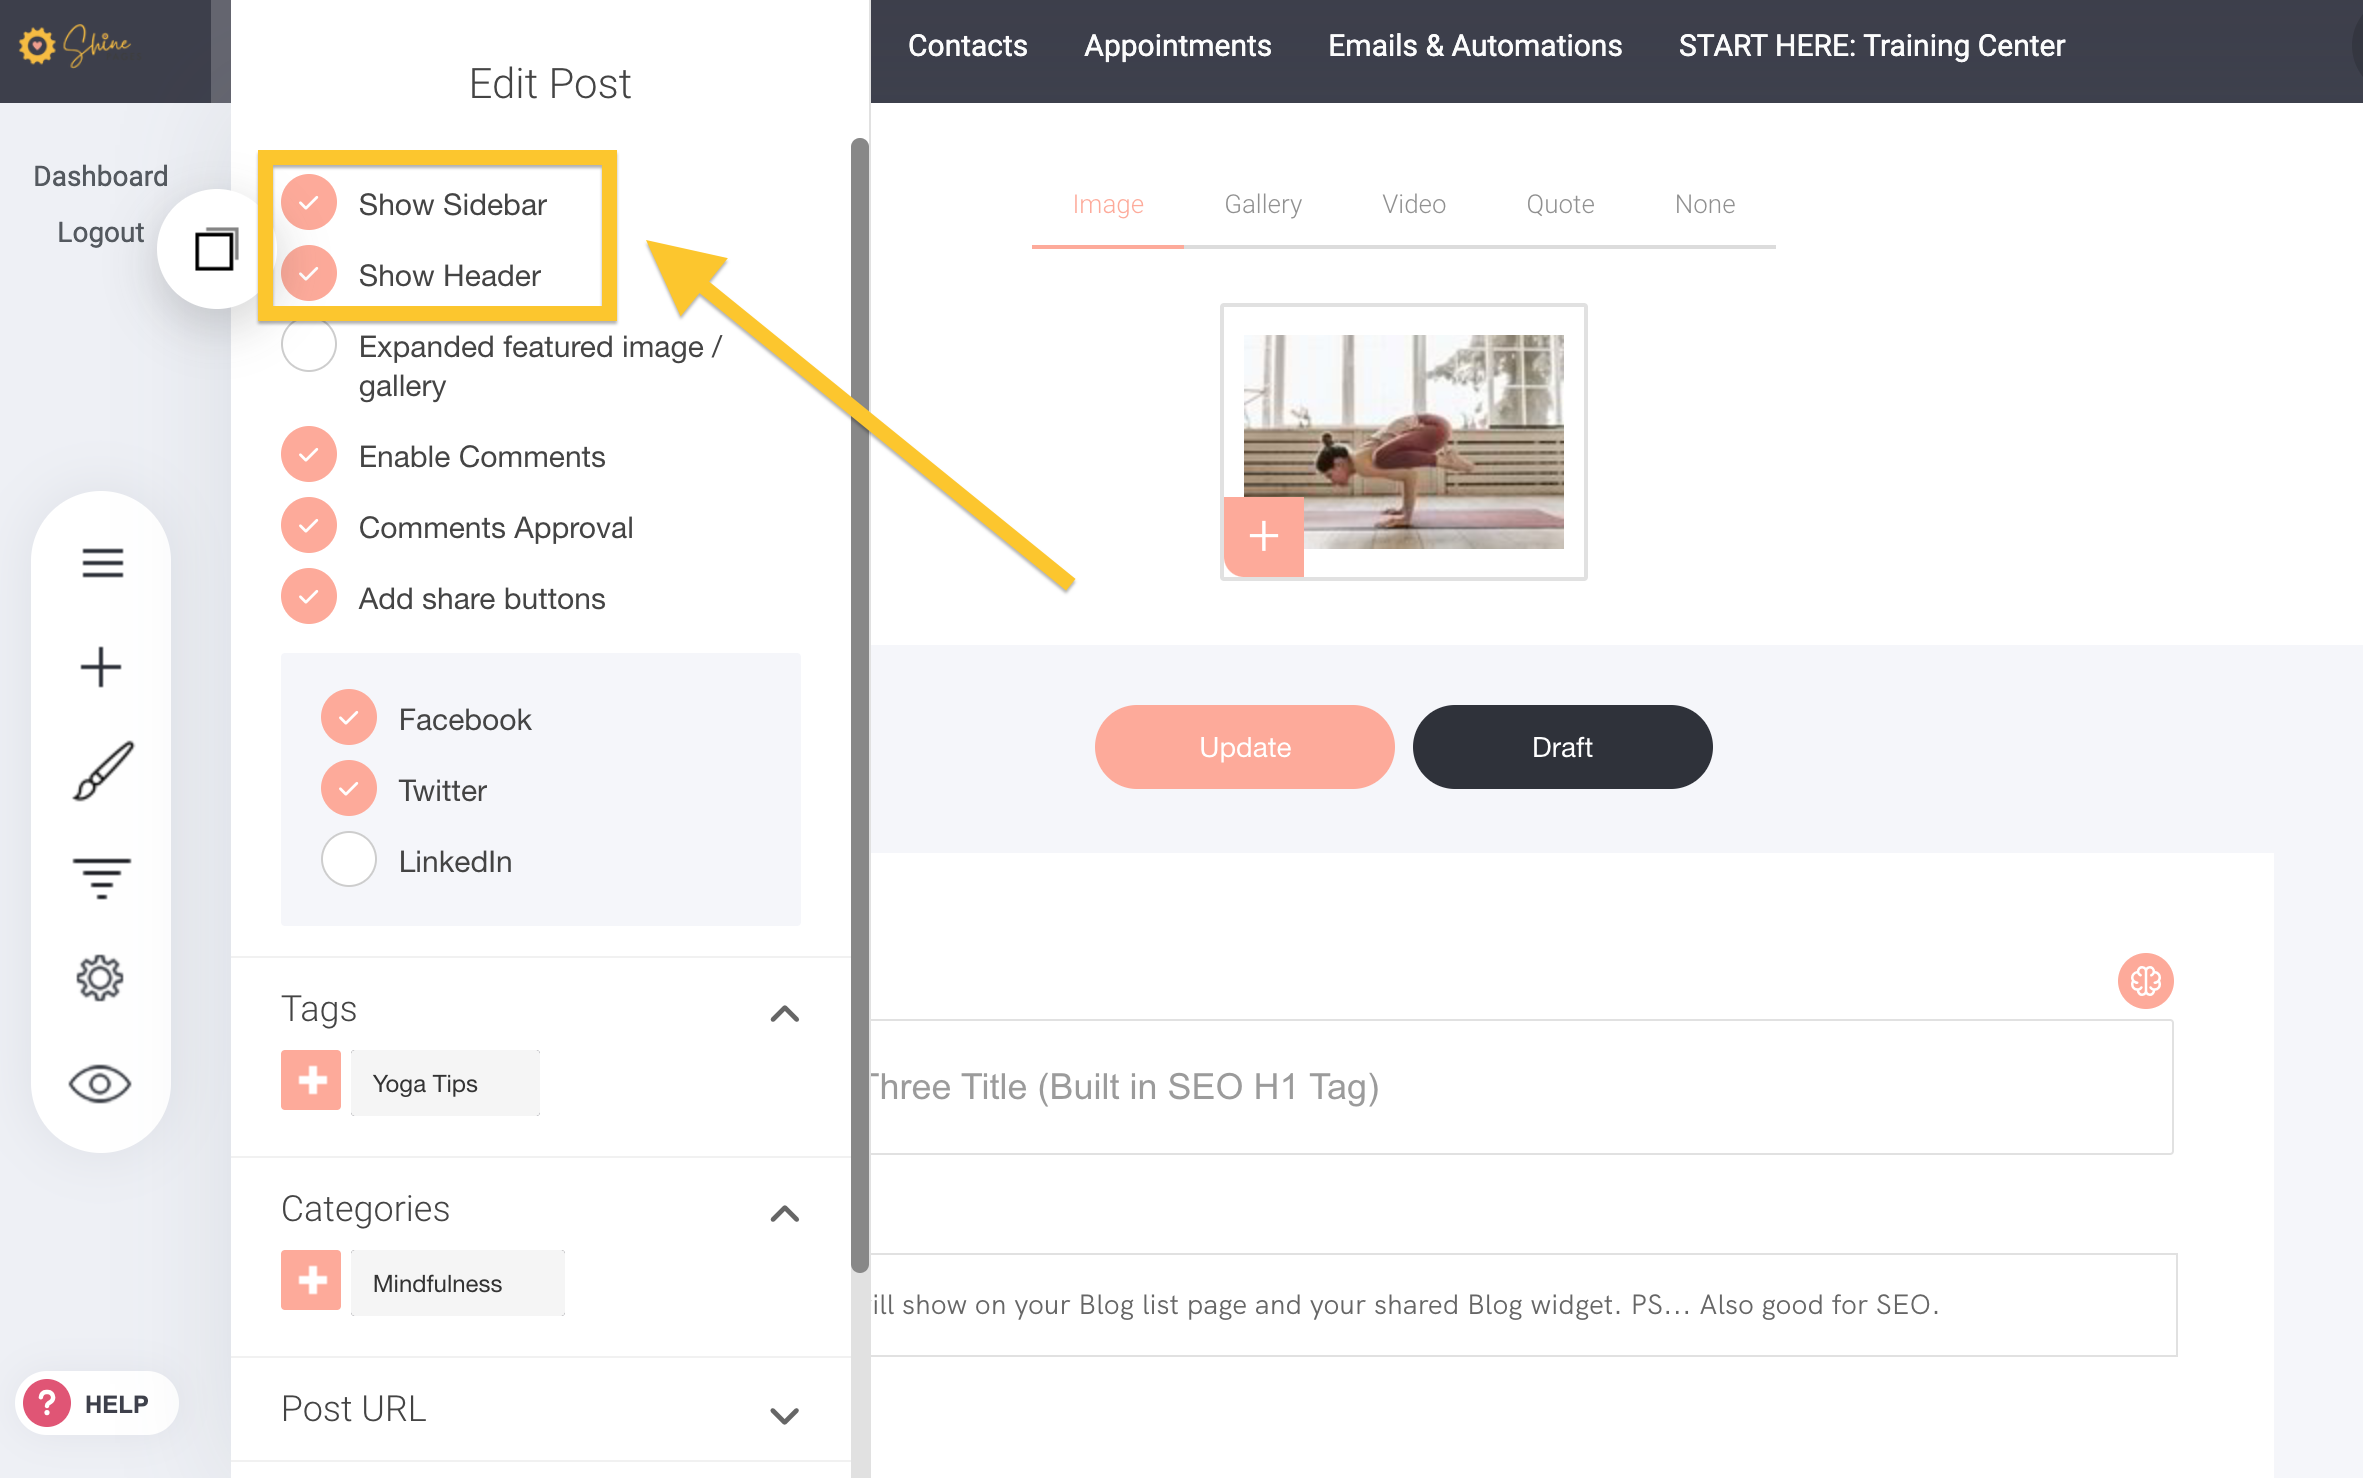
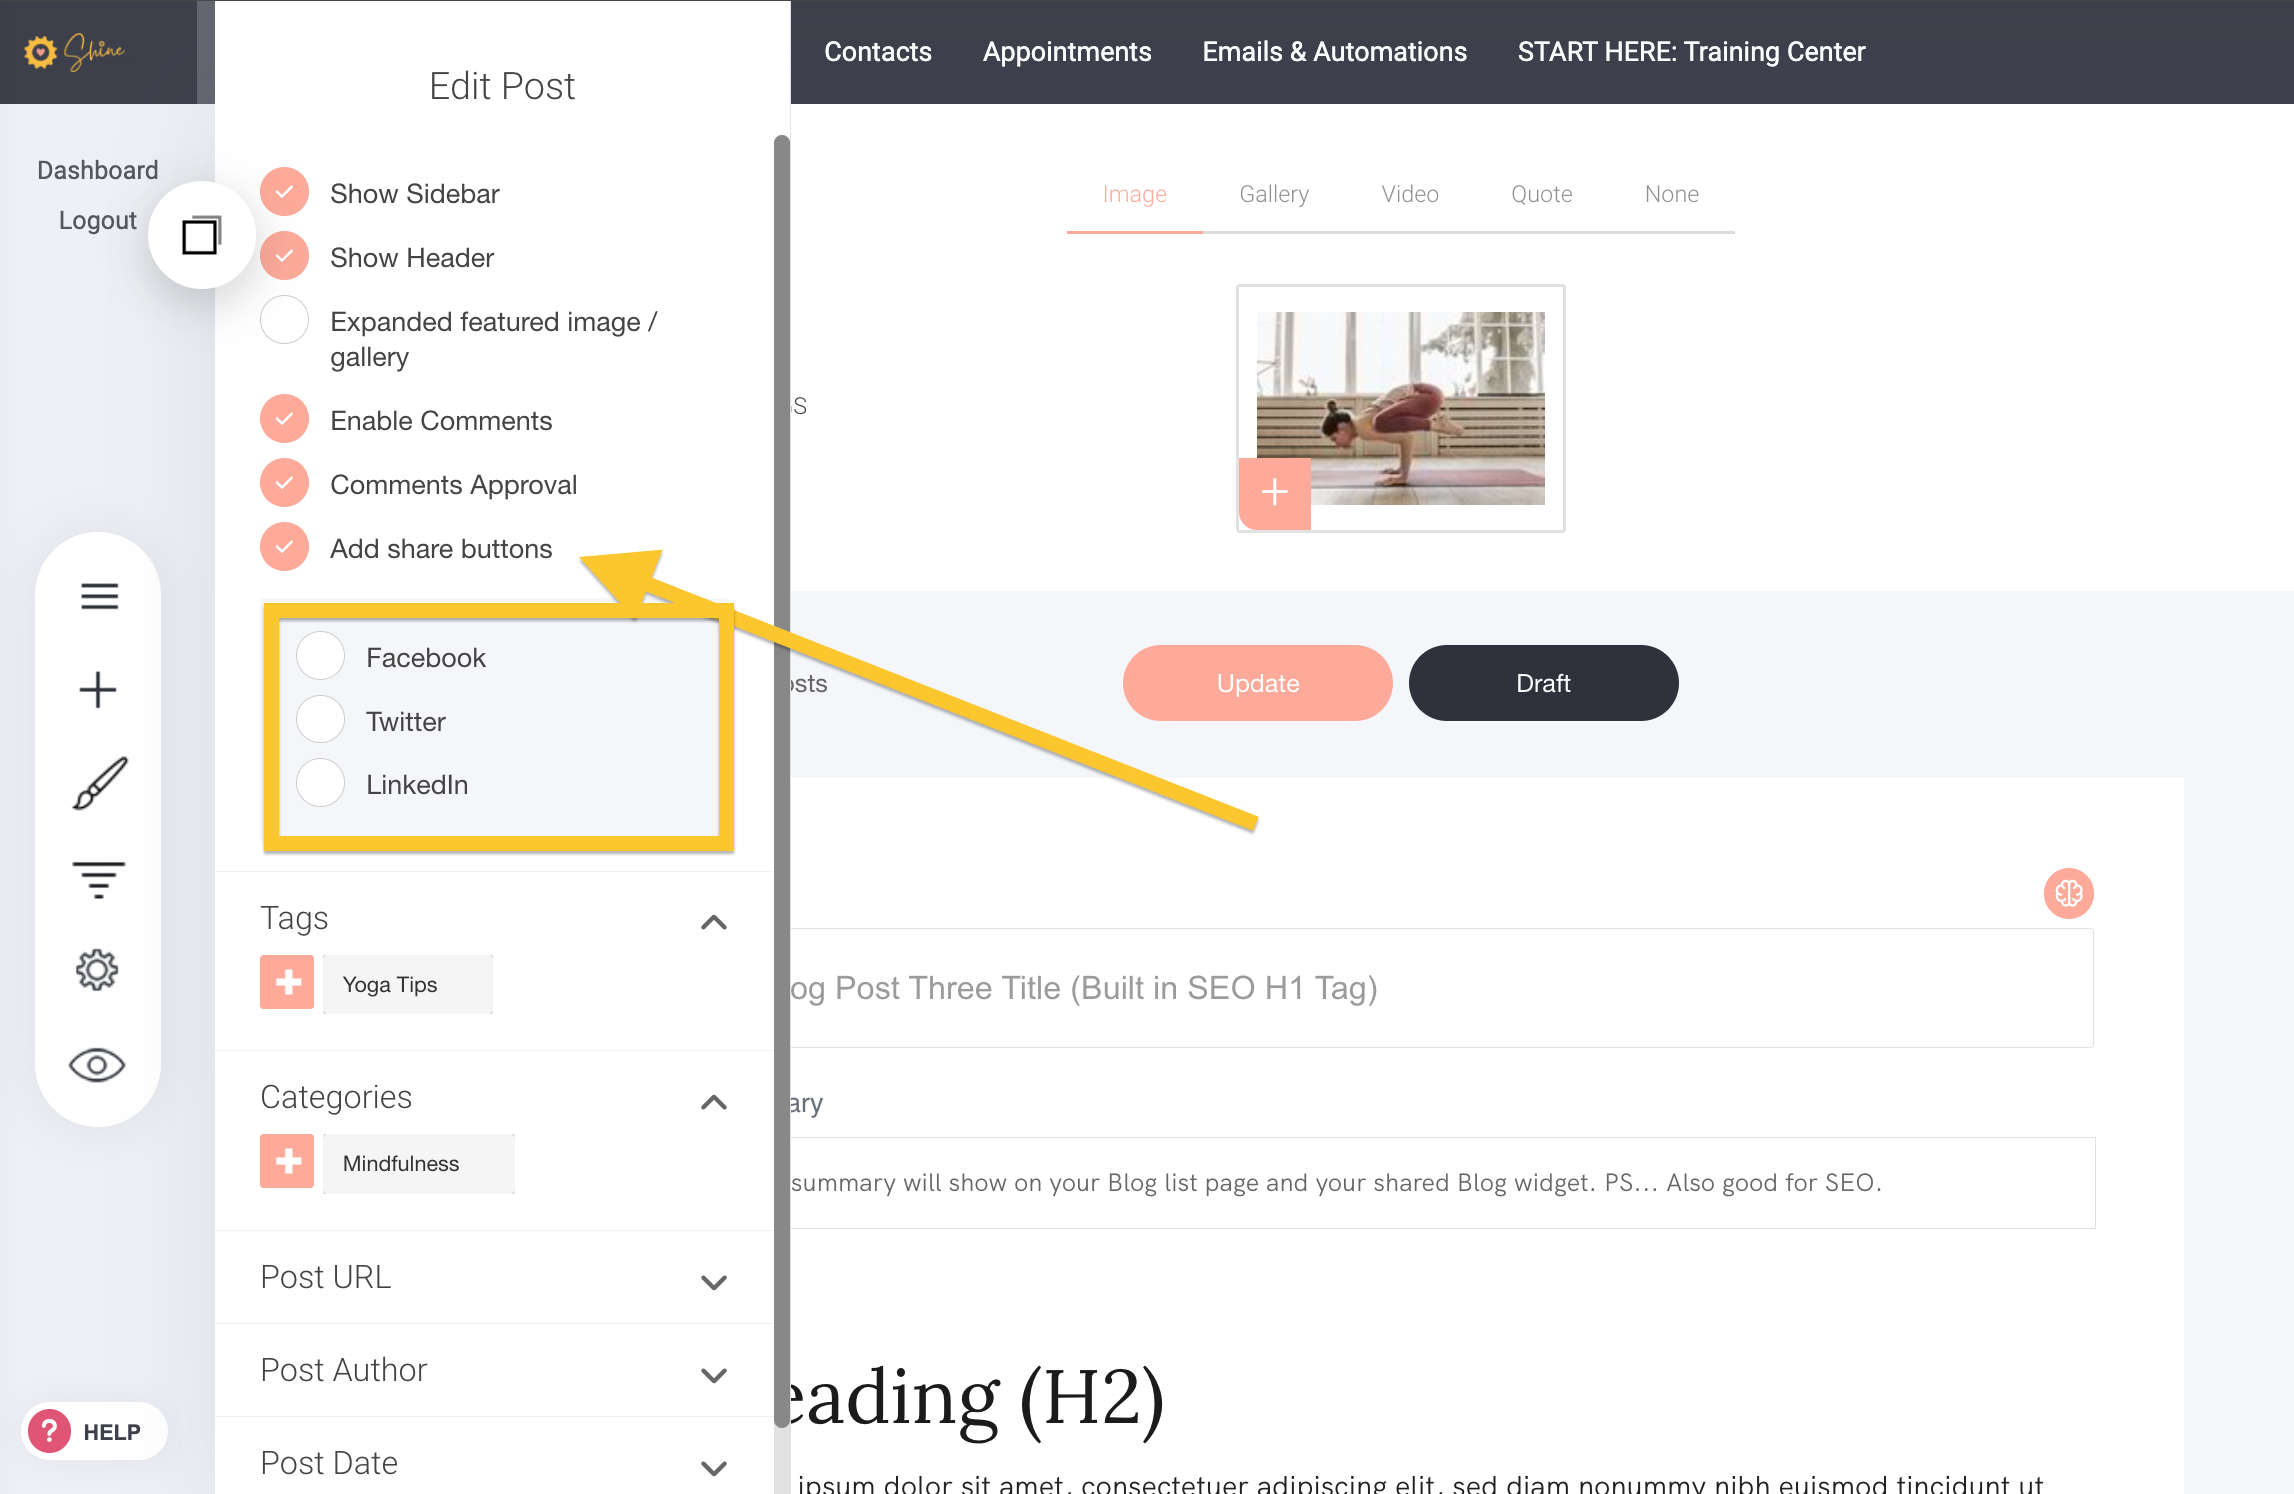
- Select whether you would like to add “Share” buttons in your post and which social platforms you would like to include.
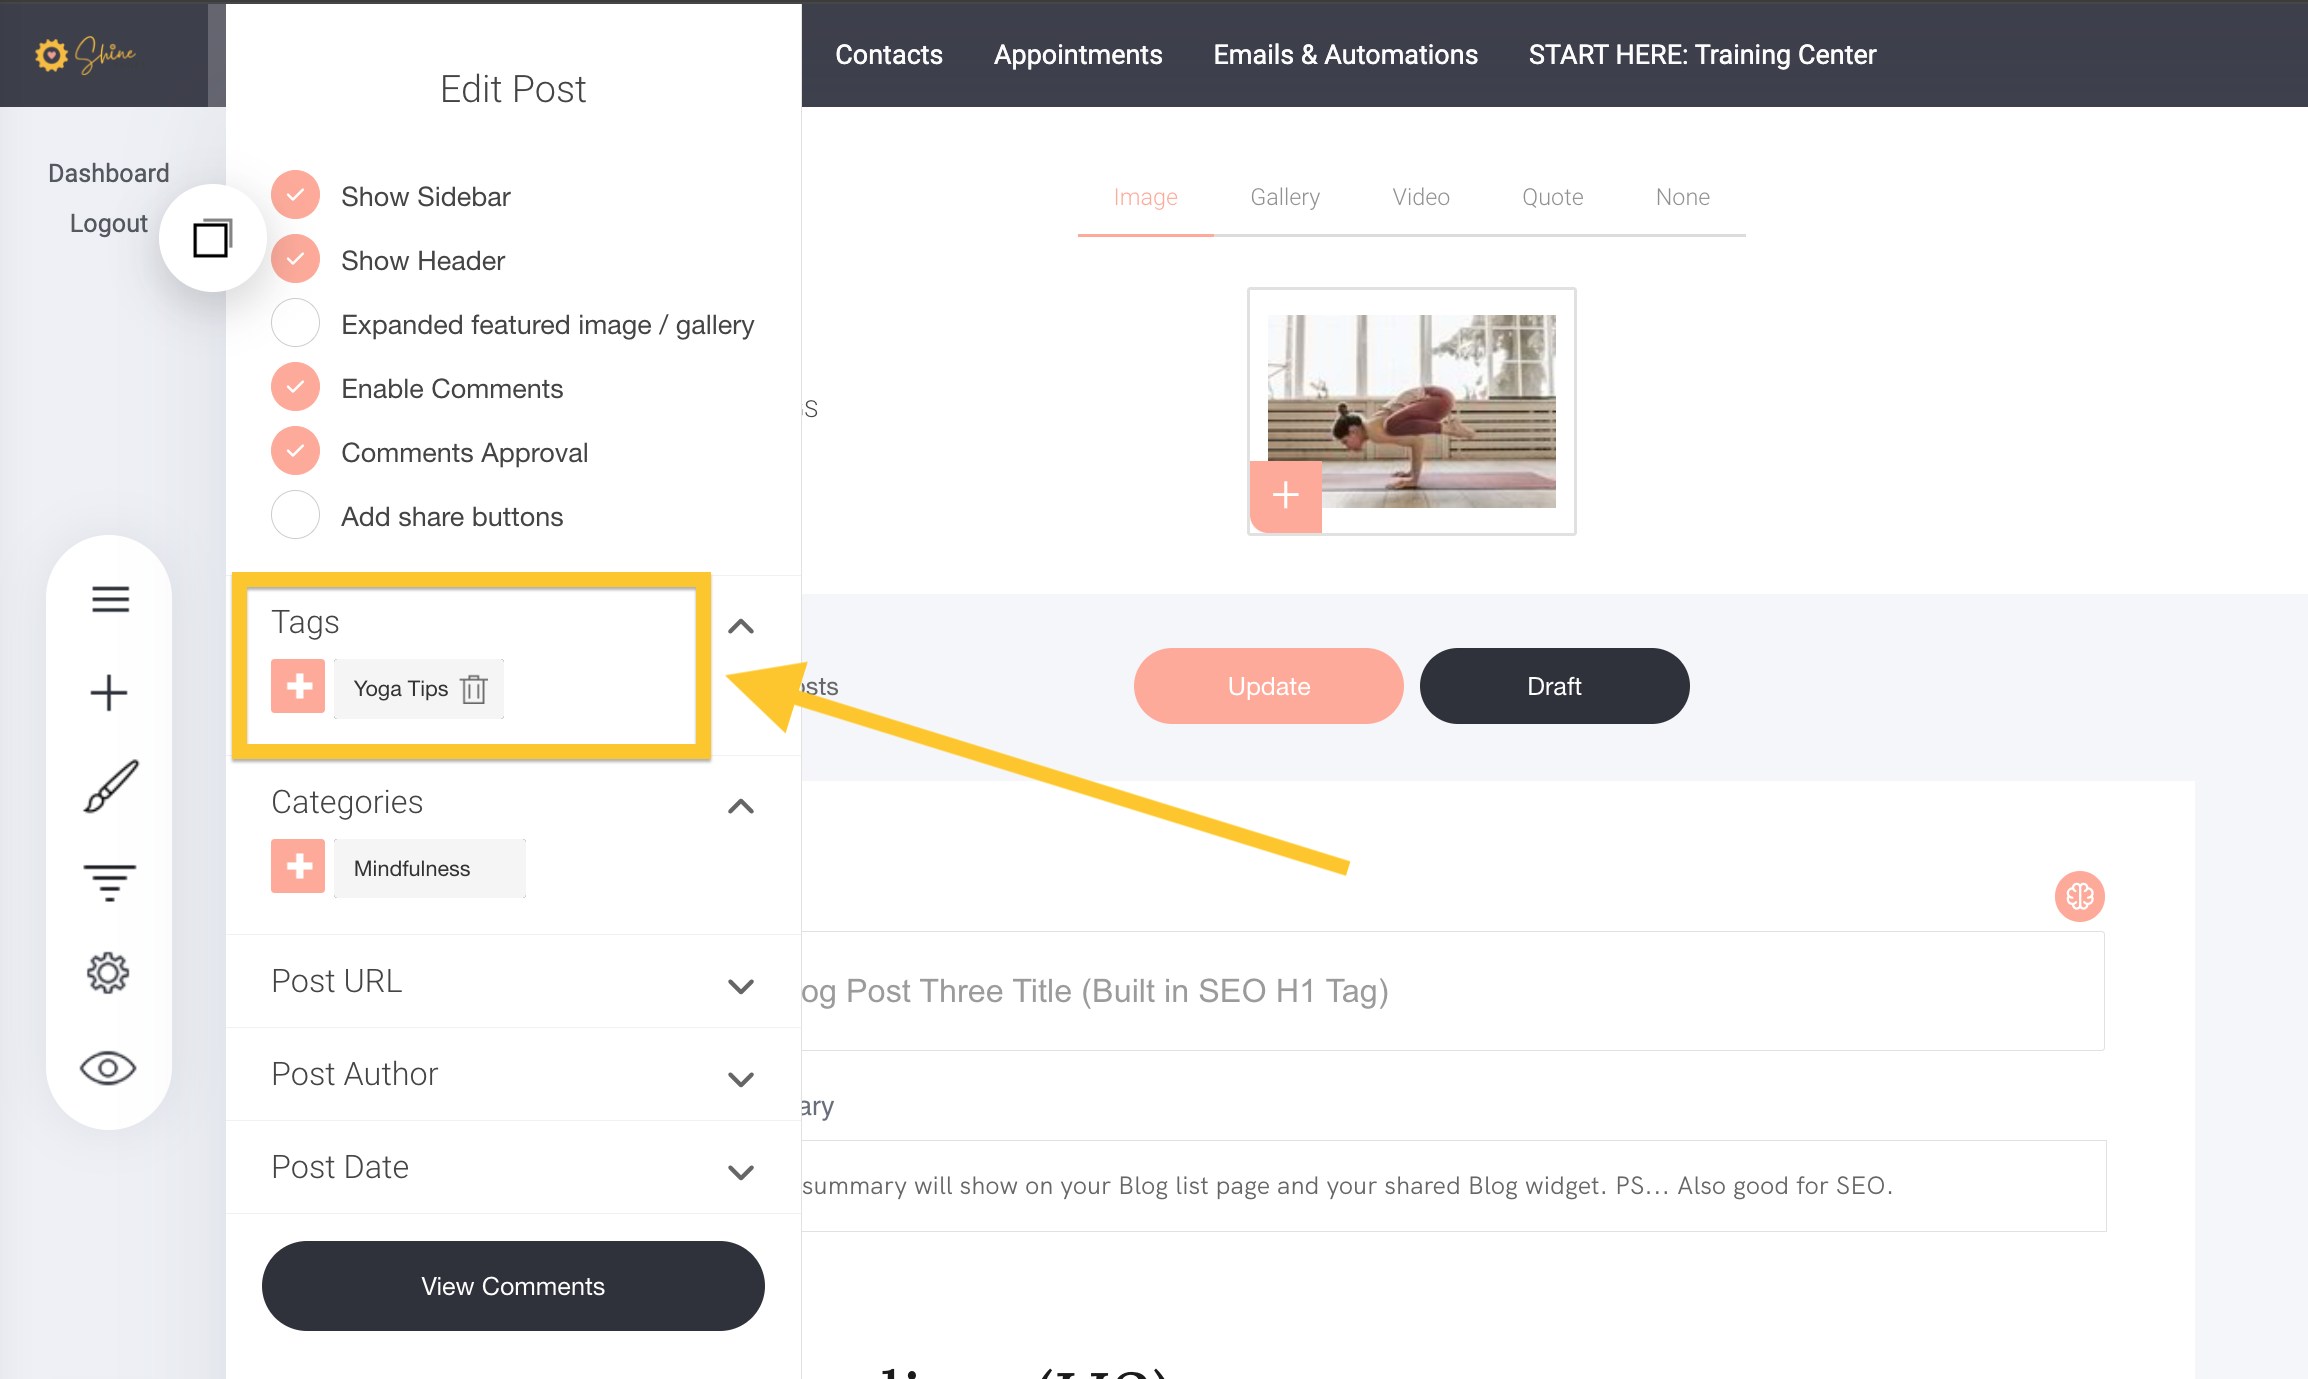
- To add “Tags” to your post - you can add + new tags or select existing tags or delete placeholder tags here.
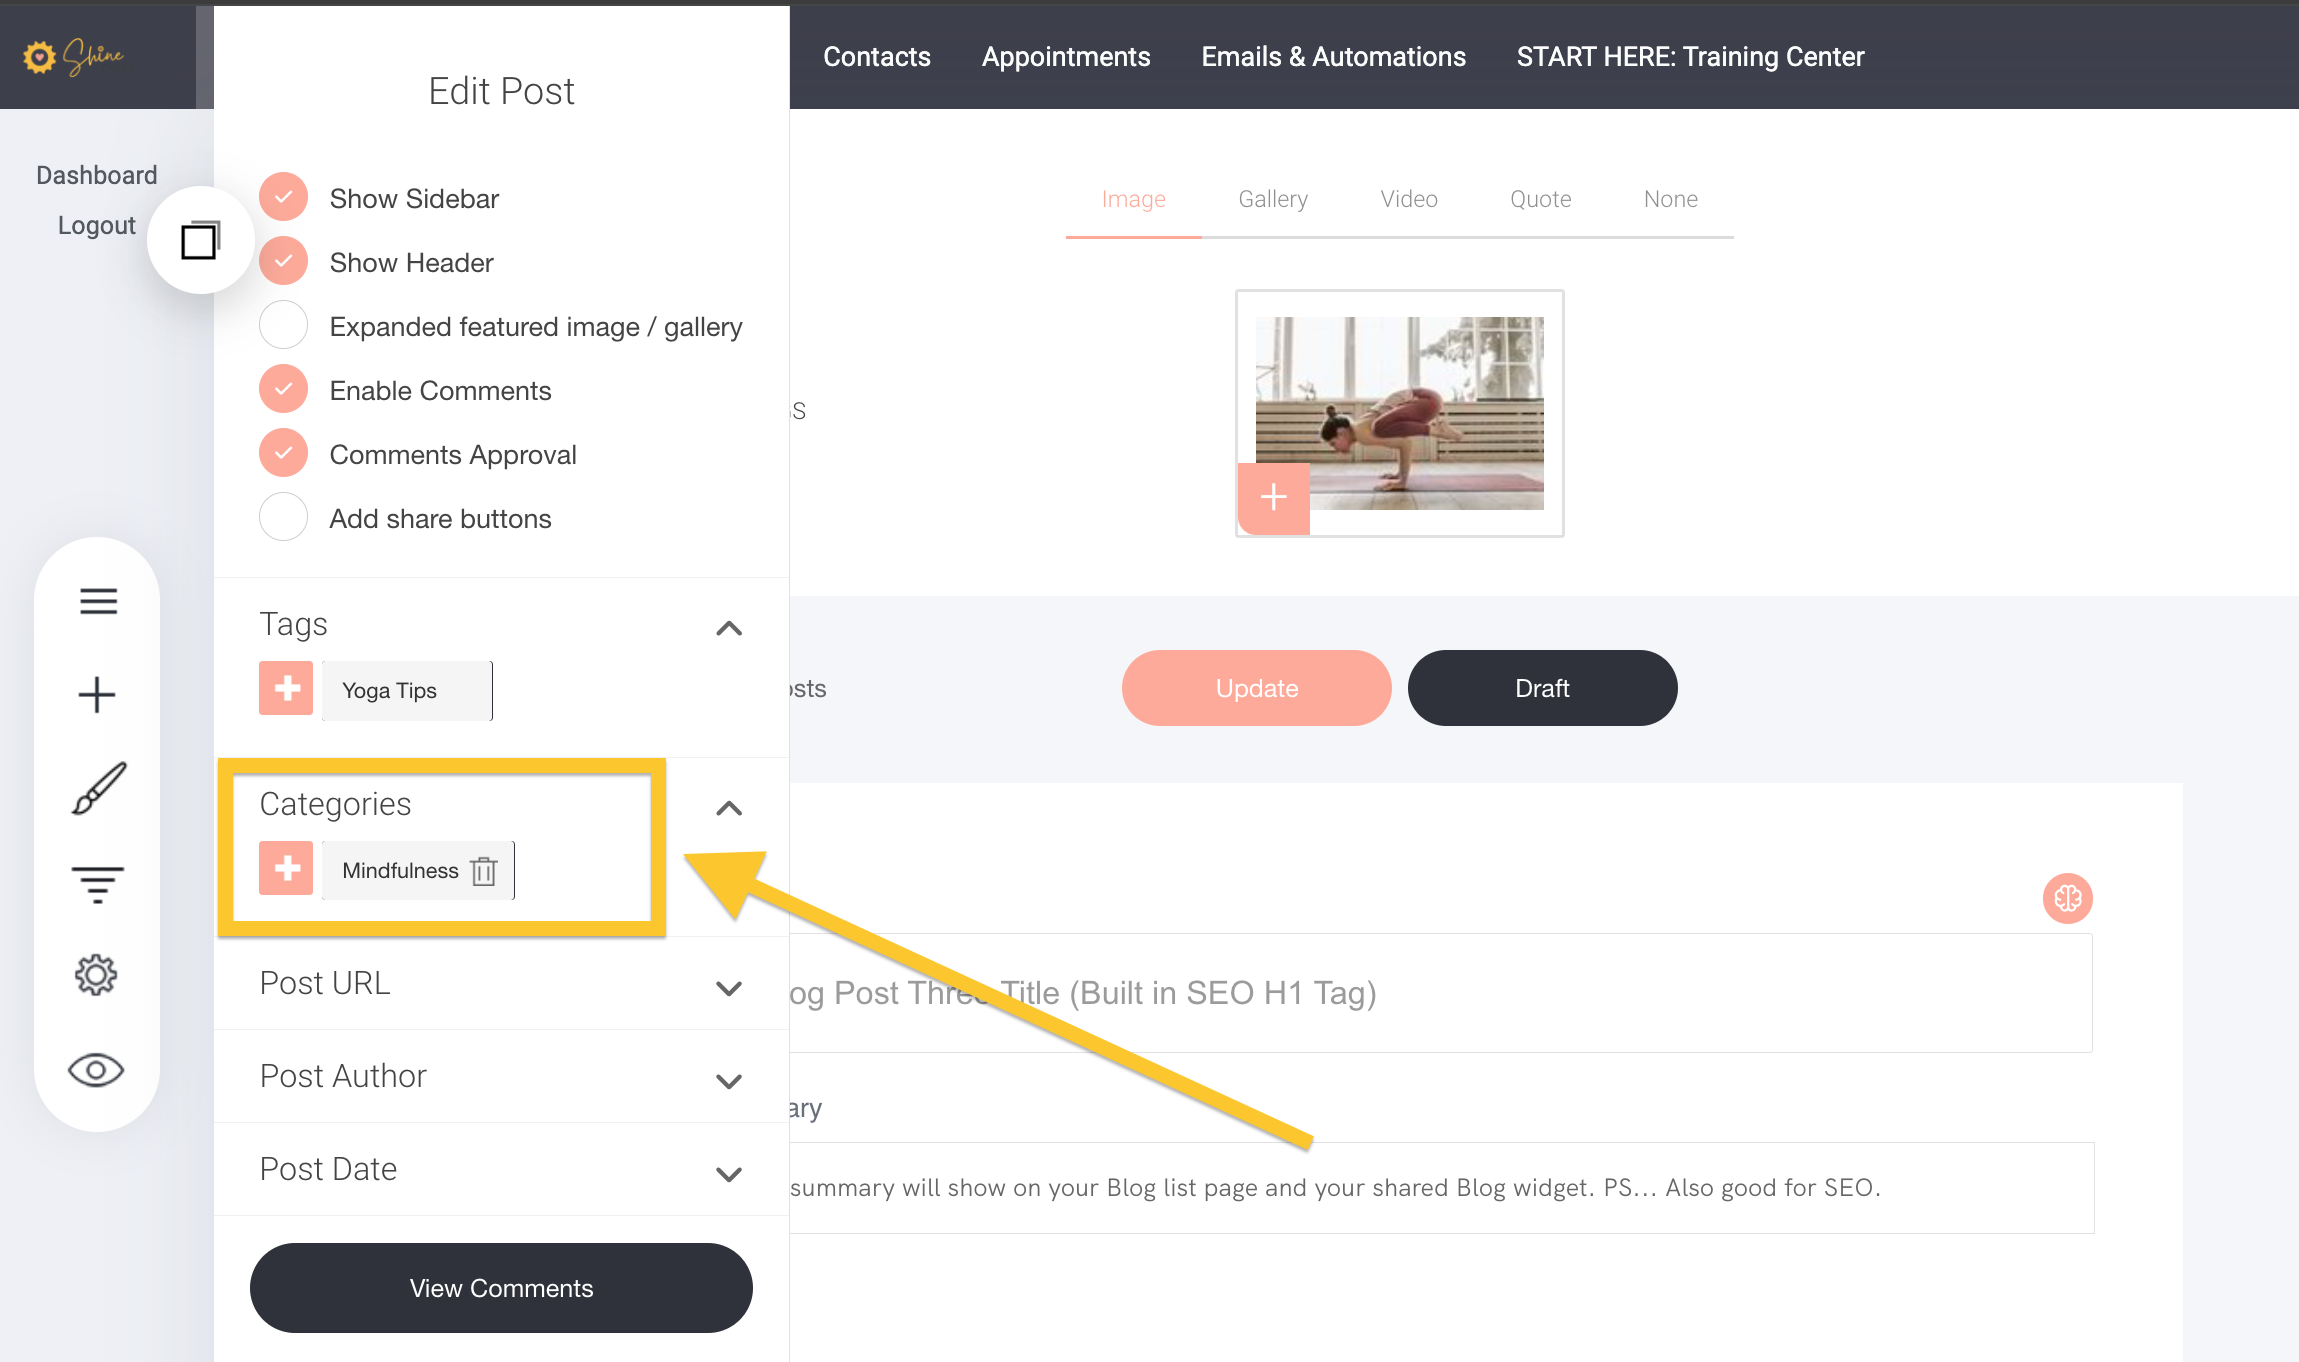
- To add “Categories” to your post - you can add + new categories or select existing categories or delete placeholder tags here.
- Post URL would be the title of your post (with dashes between each word). Your domain mybusiness/blog/blog-title

- “Post Author” added here
- “Post Date” you can schedule the date you would like the post to be published.
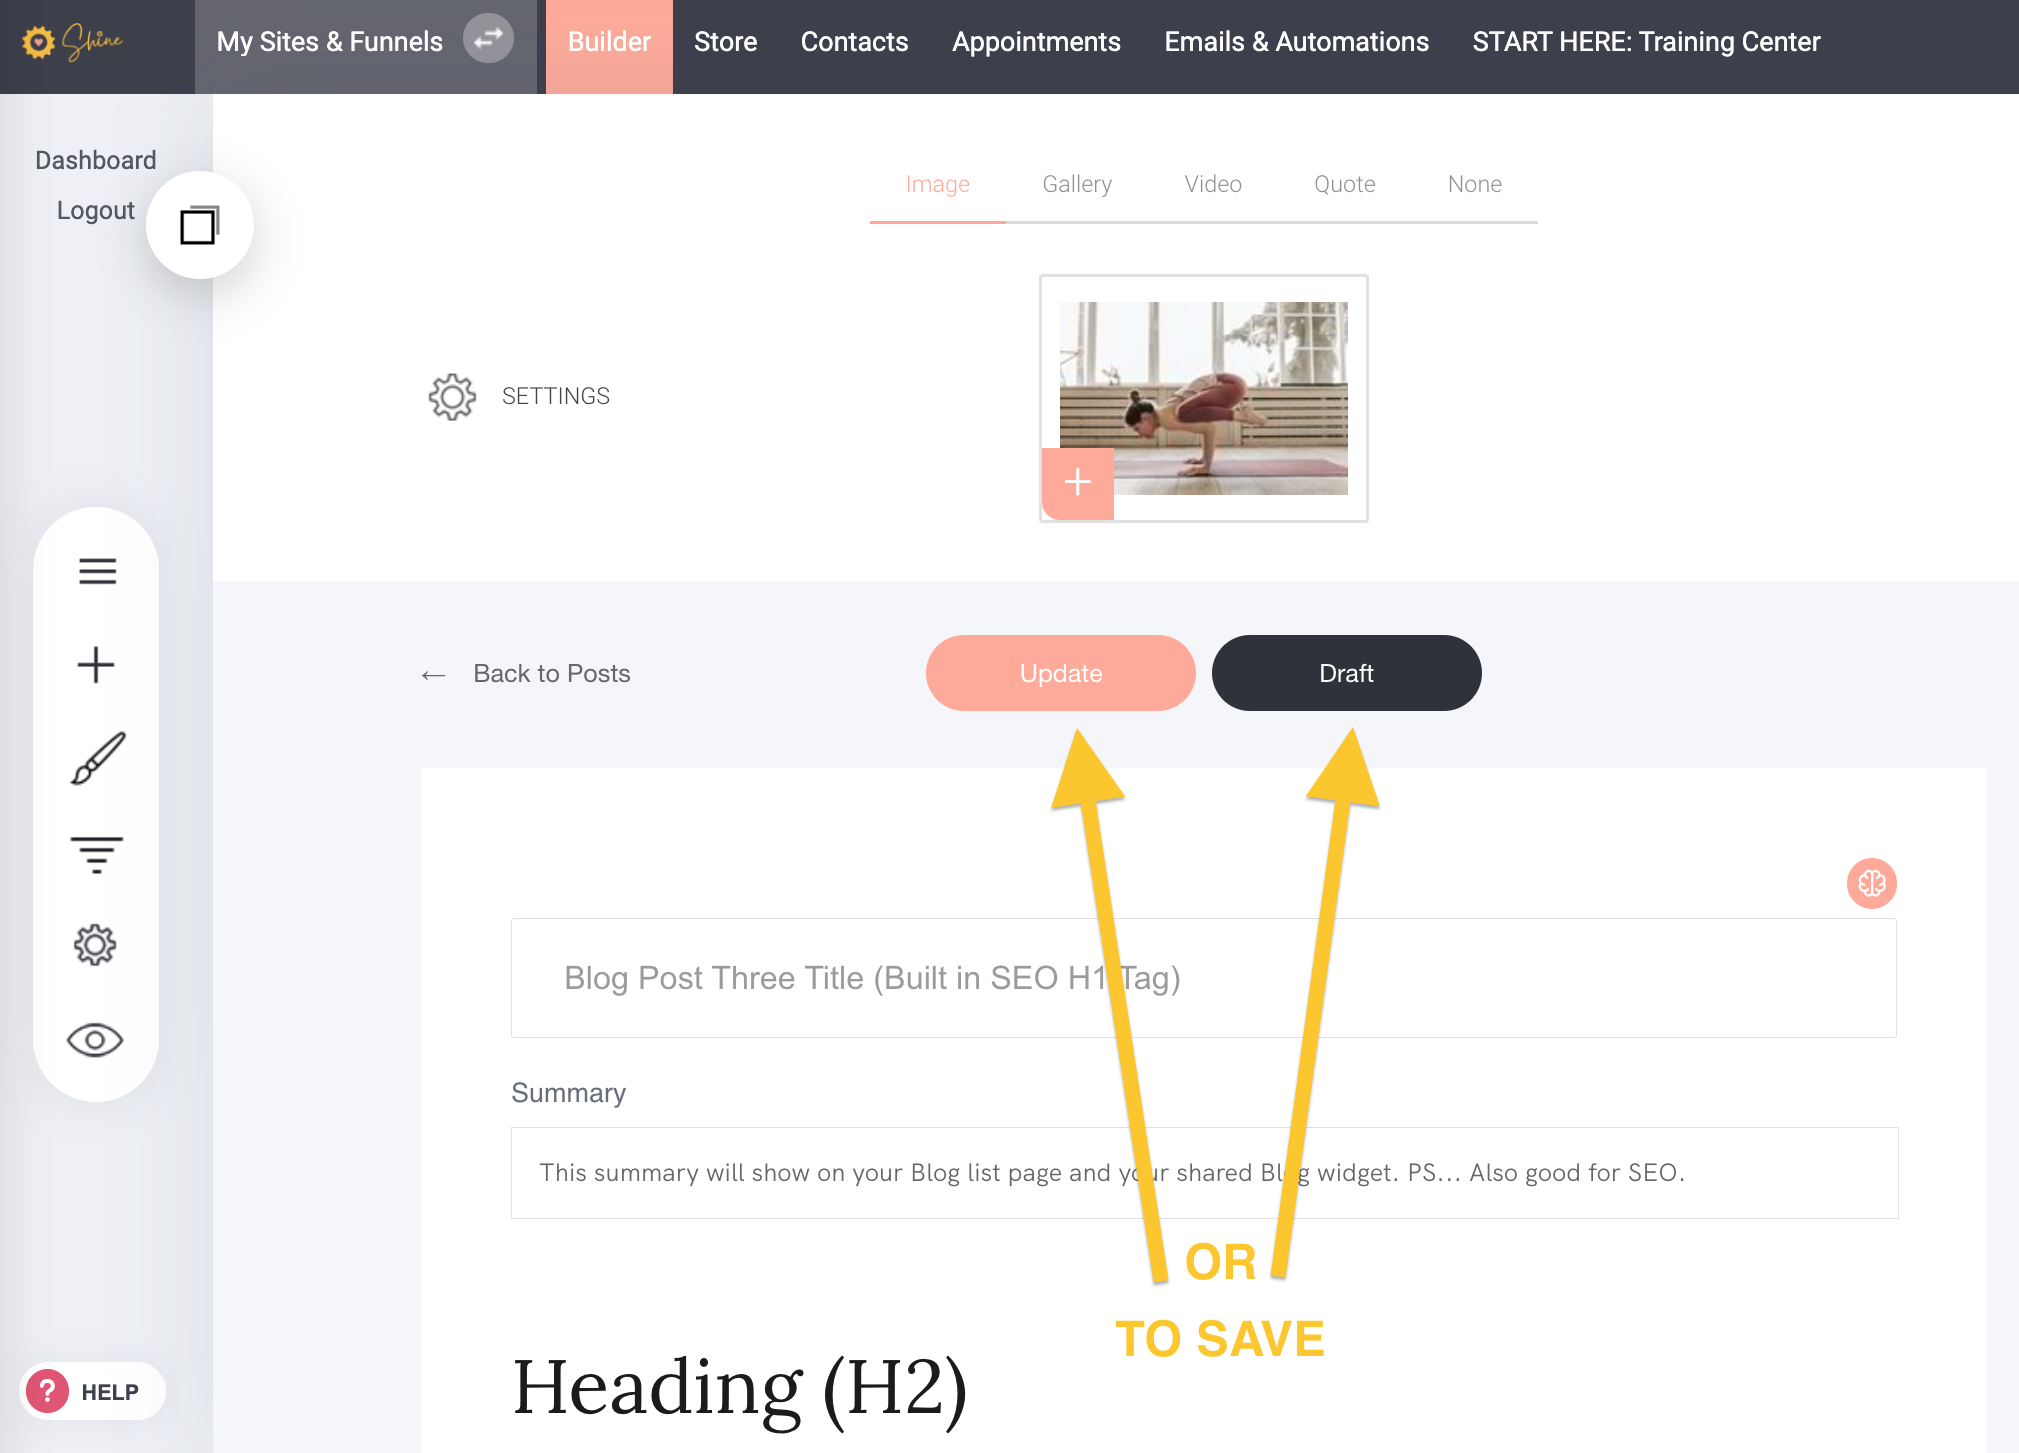
- To SAVE your post edits - you can either PUBLISH it live or you can save it as a DRAFT.